Tuesday, 31 March 2009

SKETCH TUESDAY


OMG can you believe its tuesday again. And tomorrow is the first of April......o my do you realise that makes us a quarter of the way through the year already. Scary mary stuff!


O well without further mucking about worry where the year has gone..lets get on with the show.


Well as said its tuesday which means its sketch day! Yes and another one from me..... I heard you groan in the back there...LOL


And here is my example.


I have used the gorgeous new papers from Cosmo Crickets EverAfter range. Keep watching the shop they will be hitting the shelves very soon!!.


The flowers are from my stash...I found a huge pile I had forgotten all about when i had to pack and shift house. O my the things I found!! LOL.


The big black swirl was cut using the cricut and the small black swirl is a digital brush printed out onto a transparency then trimmed around and stuck on using DS tape.


I hope you have a go at using my sketch, and I would love to see it! Put it in the CPC gallery or post a link in the comments!

one final sneak...


until the newsletter comes out...

Sunday, 29 March 2009

A little more


Are you liking what you are seeing?

Friday, 27 March 2009

Julie’s working with Chipboard....

Get a mini album base. There are lots of these chipboard based albums available in the store.

Paint any extra chip board - I have used some tim Holtz distress crackle - -mmmm tim holtz - http://www.countrypapercraft.com.au/index1.html


Cover the chip board – front and back with some patterned paper – I have used some beautiful daisy bucket paper - http://www.countrypapercraft.com.au/index1.html


Then work out where you want to put some photos


Add the painted chippes and some rubons – I have used the lovely new Kaiser ones - http://www.countrypapercraft.com.au/index1.html


Now put your album in order – I have used the plastic packet that the chip album came in to make a front and back cover


Now you need to put it all together – I have used one of my favourite tools - the crop a dile - http://www.countrypapercraft.com.au/index1.html

I have used hinged rings – they are great with bulky mini albums and lets me add ribbons etc to finish it all off.


Add some ribbons – to make it look pretty


Add a few extra embellishments and you're done…..

Tuesday, 24 March 2009

Sketch Time

Hi there, hope your Tuesday is going well so far. And speaking of Tuesday, it must be time for another sketch. I have a sketch and an example for you if you feel the need to scrap, and are in need of some inspiration, I hope you like. 

Feel free to turn it, twist it, flip it, whatever you'd like to do with it, and don't forget to upload your layout in the gallery so we can have a look at you handy work, we'd love to see.
For my example I've used some of my favorite Basic Grey "Urban Prairie" paper, some Thickers, Carolees and Basic Grey alphas, Green Tara blossoms, Kaiser Bling and my gel pens for the border.
Enjoy the rest of your day. Bye for now, Lynlee x.

Tuesday, 17 March 2009

Sketch Tuesday

Time for another sketch...boy where are these weeks going to?? It will be easter before we know it then Christmas again...scary stuff.

Anywho.....are you ready for another sketch??
here is it I hope you like it and have a go......

Remember to put it in our gallery or even post a link inn the comments if you use it someplace else.
We would love to see it!!


And here is my example


I have used some flowers, Heidi Swapp letters, a Heidi Swapp stamp, a Melissa Francis keyhole and some gorgeous Kaiser rub-ons all available from the shop.


Go forth and create and dont forget to share!!!


Friday, 13 March 2009

Mish's Blind Scrapping Challenge

Well it's Friday 13th...

Watch out for black cats, ladders, and no stepping on cracks in the pavement!

So to keep you all away from all those old Superstitions, Mish has given you something to keep you safe whilst indoors.

Supplies Needed:

1 - 12 x 12 cardstock

1 - patterned paper 7 x 11

3 - co-0rdinated strips of patterned paper measuring 12 x 2, 12 x 1, 12 x 3/4of an inch
tear or distress the edges of these paper strips.

1 x 5 x 7 Landscape orientated photo

4 or 5 strips of journalling - a quote is a useful thing to use.

Strip of cardstock or plain patterned paper 5 x 2

Chipboard alpha for the title, and alpha stickers for the sub title

Embellishments to suit your photo

Inks, paints, tools

Step 1

Ink and distress the edges of your cardstock.


Step 2

Distress, tear and ink the 7 x 11 piece of patterned paper. Adhere to the left hand side of your layout.


Step 3

Using paint on your finger run a thin border around the edge of your photo. You could also distress and ink if you do not have paints. Set aside to dry


Step 4

Take the 5 x 2 inch cardstock or patterned paper, and either draw freehand on the back of the strip a scalloped edge. Cut this out. You can use any other border punch you wish if you like.

Distress and ink the scalloped edge on the RIGHT side. Attach to the left hand side of your photo, about 2cm from the top.

Step 5

Adhere the photo to the top left hand corner of your layout - about 2 inches from both top and left side.

Step 6

Distress and ink the strips of co-ordinated patterned paper. Place these running horizontal across your page, under the photograph. You may want to stagger these so they don't all start and finish at the same place. Cut to your own desired length.

Step 7

Distress and ink your journalling strips and place down the right hand side of your photograph.

Step 8

Add your chipboard title on the top Left hand corner of your photograph, with your subtitle running across the bottom right hand of your photo.

Step 9

Embellish your layout to suit your photo, remembering to balance your layout by creating a visual triangle.

Have fun and don't forget to share in the gallery.

*edited to add* Mish has done hers and loaded in the gallery. She has taken poetic licence and moved everything to the right to suit her patterned paper.

Tuesday, 10 March 2009

Tuesday is Sketch Day

Our very talented Designer Deb, has been at it again, creating gorgeous sketches to give us inspiration. Here is her latest offering! I can't wait to create with this one.

Looking forward to seeing how you use this sketch - don't forget to share with us in the Gallery!

Thursday, 5 March 2009

Gadget Gal's new toy - Clip-It-Up

I have to admit that I am a bit of a gadget gal. Tell me something will improve my scrapping, or make me stand out in the scrapping crowd - and I just have to have it. Sales Rep's rub their hands together when they see me coming, lol. You name it, and I probably have it!!

I started scrapping with Creative Memories - dont ask me how many of their tools and templates, and the like I have, and then I discovered the World Wide Web and the US scrapping sites. Every new thing I had to try and get. You really should see my cupboard: Fastenator and a gazillion staples for it; Phrase Maker and a bazillion labels for that; and the list goes on. However I wont bore you with too many more details, except to let you in on one of my better purchases.

After much discussion at the FORUM, I decided I needed to have the Clip It Up. This time, I did a bit of research to make sure that this was something I would use and not hide away.

I used to store my alpha stickers (A4 size and smaller) in one of those plastic 4 drawer thingy's - well 2 actually, and my rub ons in plastic sleeves in an A4 folder - well 2 of those as well.

Not that successful cos I could never find anything when I needed it, and then I forgot that I had a particular rub on, one I could have used on my previous layout - but isnt that always the way.

Anyway, I digress.


I bit the bullet and placed an order with Marg at CPC, an lo and behold, in super quick express post time, lol, I had my new toy:


Wow, base unit, top tier, and a cover. And it is so huge.
I just had to wait for Daz to go out, and lucky for me he obliged, so I could set it up.

It was a bit of a struggle, putting it together, but once I read the instructions with my glasses on, lol, it went together nicely.

The boys were amazed with this huge contraption that was taking up a mountain of space on my scrapping desk, they couldnt decide if I really needed it or not - that was until I started emptying the various receptacles for my alphas and rub ons. What a stash.


It was then that they decided I should have bought 2!! Cheeky little brats :)

Anyway, it will be a while before my new gadget is set up fully cos I am waiting for my new scraproom to be finished - well, to be started actually - so I can place her permanently on display. But here is a sneak peek of what she is like now:

Isnt she just the bees knees???

Anyway, I think you should all go out and purchase one of these beauties. I know my scrapping life will soon be so much easier.

Take care
TD xoxo

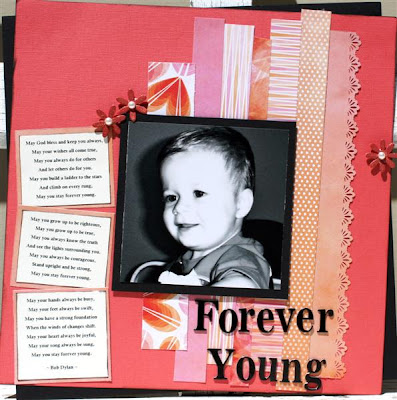
Layout from the Gallery - Colleen's Little Star.

While checking out the Gallery this morning I spotted this fantastic page from Colleen. It is of her little Grandson. Might even take up the challenge of using white with one..Awesome layout!

Tuesday, 3 March 2009

whats new instore this month....

March Designer Kit

March Add on Kit

Carolee's Creations 3D sticker Embellishments - Dance, Dream, Love/Family, Smile, Summer Goodies

Carolee's Creations Tiny Etched Stickers - Numbers

Cuttlebug Tag Team - Build a Flower - Textile Hearts

Cuttlebug Die - Disney's 'Ahoy Matey'

KAISERscrapbook Paper Rangers, including co-ordinating brads - Airy Fairy, Sugar Sugar, A la Carte

KAISERcraft Rub-ons - Sugar & Spice, You & Me, Argentella, Babies, Back to School, Boy's Zone, Boys Border, Doilies, Experience, Florals, Friendship, Garden Vine, Girl's Rule, Heritage, Life's Moments, Mothers, Romance Borders, Romance, Rustic Elements, Take Flight, Thank-you Cards, Birthday Cards, Type & Scratched Alphas

Basic Grey Porcelain Range - Eloquent Stamp, Chip Sticker Alphabet

Bazzill 10mm Brads - brads that co-ordinate with Bazzill's Cardstock range

Carolee's Creations Cardstock Stickers - Summer Fun, Me & My Horse, New Baby, My Boy, Sleek Alphas have been restocked

Marvy 2.5" Punch restocked

Range of Limited Edition Dies - 2 x 2 Daisy, Punctuation, 4 x 4 Nestled Circle Flower, Tattoo Art, Contemporary, Grass, Border Vine, Butterfly & Dragon, Marisa Lower Case Alpha, Flower Pot

This week's Sketch

was created by Mish.

Don't forget to share your creations in the gallery.

Saturday, 28 February 2009

MARCH DESIGNER KIT & ADD-ON


This month's kit is consists a black, grey, white and red mix of Damask printed papers, with a certain regal feel to them. The Designer's were all very eager to create with these kits once they received them.

This kit features:

Theresa Collins Damask Paper - Negative Double-sided Paper
Little Yellow Bike Grey Damask Double-sided Paper
Little Yellow Bike Love Letter, Grey with White Flocked Pattern
Little Yellow Bike Decorative Edged Solid Square Paper
Little Yellow Bike Decorative Edge Grid Circle Paper
Grayson Hall Tell Your Story Alphabet & Journal It Tags
Little Yellow Bike Transparency Strips
Quickutz Flourish - cut by Marg
Bazzill White blossom - stamped by Marg with a Script Stamp
Red Glitter Miniature Flowers
Pearl Hat Pin
Large Black Brad
Bazzill Cardstock
- White OP
- Elephant
- Raven
- Amsterdam


March's Add-on Kit Features:

Carolee's Creations Tiny Etched Alphabets
7Gypsies Journalling Tag
Silver Metallic Journalling Gel Pen
Decorative Buttons
3 Green Tara Blossoms
Length of Cream Braid
Chipboard Bookplates
Quickutz Book Binders

Check out what the DESIGNERS have created with these awesome kits in the NEWSLETTER

Friday, 27 February 2009

Thursday, 26 February 2009

Wednesday, 25 February 2009

Sketch and a gallery Layout...

I just wanted to share a sketch that I did last week for the Bush Fire cyber-crop we had on the weekend, and a gorgeous interpretation I spied in the gallery by the very lovely Michelle (aka Mrs Frizz) from NZ. 
Well done Michelle, I love the colours you've used and that photo is classic :) Have a great day. Lynlee x

Want to see a little more???

Here's a little bit more of the kit!

Are you tempted????

Tuesday, 24 February 2009

March Sneak Peek

Here it is .....

The first sneak peek at March's Designer Kit.

This month's kit will knock your socks off!

Sunday, 22 February 2009

Silent Auction, Raffles & Bushfire Appeal


We are holding a silent auction at Country Papercraft to raise funds for the bushfire appeal.

Up for grabs at the auction is this fantastic bag of goodies!

Valued at over US$100. So all you need to do is email me - countrypapercraft@gmail.com how much you wish to bid for this item!

All Proceeds go to the bushfire appeal. You have until Monday 24th Midnight to email your bids. After that the bag goes to the highest bidder!

We are also holding a raffle in the Shop for a fantastic KAISER gift pack. To purchase your tickets just head on over to the shop and add a few to your basket. Remember 10% of sales in the shop go to the BUSHFIRE APPEAL.


Have you been and checked out the challenges that the Designers have posted in the Forum???

Thursday, 19 February 2009

this weeks sketch


ok so if you recently happened by the blog you would have seen a different weekly sketch here before, and you probably thought...hang on thats the same fantastic sketch Deb provided us with the other week....lol Ummm technical glitch...gremlins??? You've had too much to drink already??? Nah we thought it was so fantastic we would give it to you again, but then thought...hmm maybe you would like a different one.


So here goes.....this weeks sketch brought to you by Leonie!

I hope you like!!!


Sunday, 15 February 2009

February's Mid Monthly Newsletter is out

It should have hit your inbox by now! If not, please subscribe in the box over there on the right!

New products in store this month are:

Simple Scrapbooks "Quick & Easy Scrapbooks"

GCD Schooled Pad - contains 24 sheets 12" paper

Rusty Pickle "I Love You" patterned paper

Fancy Pants Transparency Sheets

Scrapbooking Australia "Wiggles" patterned paper

Print Blocks 3 Ringed Albums - Hot Pink

Inkadoos - back in stock

Jac double sided adhesive paper

Core-dinations Cardstock Pads

Nestabilities - Curved Rectangles, Classic Ovals, Scalloped Ovals, Long Classic Rectangles, Long Scalloped Rectangles, Embossing mats

Hybrid Gel Pens - back in stock

Cricut Cutting Mats

KAISERscrapbooking Brads - Argentella, Lovestruck

KAISERscrapbooking Sweets Range (as featured in Feb Designer Kit)

Crop-o-dile BIG Bite

A2Z Chipboard - assorted frames, embellishments & words


Thursday, 12 February 2009

A sketch for you...

Well, I have another sketch for you today, so if you feel the need for a bit of inspiration, maybe this sketch will jump-start your mojo. Don't forget to upload your layouts in the gallery, we would love to see your interpretations.

And, here is my interpretation using the gorgeous Crate Paper Mia collection. Happy scrapping, bye for now. Lynlee.


Wednesday, 11 February 2009

Bushfire Appeal!

Country Papercraft is doing their bit in raising funds for the Bushfire Appeals.

Next Weekend 20th - 24th of February we are holding a CYBER SCRAP-a-THON over in the FORUM

There are going to be challenges with prize packs, and 10% of all sales on the SATURDAY will be given to the Bushfire Appeal! So why not spend up big, increase your scrap stash and give money to the Bushfire Appeal.


How about getting some of your non scrapping friends to sponsor you on how many layouts you will create over the weekend? The more layouts you get done - the more money you raise for this worthwhile cause!

Sponsorship forms are available for download by sending an email to me.

Monday, 9 February 2009

Anyone up for a bit of Blind Scrapping??

Thought I might have a go at providing you all with a blind scrapping challenge, so go forth and gather your supplies :)

You will need: 1 x cardstock for the base
1 x patterned paper 18.5cm x 17cm
1 x patterned paper 4.5cm x 26.5cm
1 x patterned paper 30cm x 9.5cm - I scalloped the bottom edge, but you could tear it.
1 x ribbon or lace 17cm long
1 x photo - mine is 10cm x 11cm
Chipboard, sticker or rub on alphas for title
Tiny alphas for sub title
Blossoms, chipboard shapes, bling for embellishing.

Ok, here goes:

Distress and/or ink the edges of your patterned paper.

Take the 30cm x 9.5cm piece of pp and place along the bottom edge of the cardstock. Mine is about 2cm up from the bottom with the scallops facing down.

Next, take the 4.5cm x 26.5cm strip of pp and place down the left hand side. Mine is about 2.5cm from the left edge and overhangs the bottom piece slightly.

Place the 3rd piece of pp over the strip and bottom pieces. Mine is about 4.5cm in from the left edge and about 6cm down from the top.

Are you still with me??

Now place your photo on the 3rd piece of pp. Because mine is almost square, it fits nicely, and I placed it about 6.5cm from the left edge and about 10.5cm up from the bottom.

Place the piece of ribbon or lace along the bottom of the 3rd piece of pp, up about 1cm and extending onto the scalloped strip.

There you go - nice and easy, and hopefully understandable.

Place your title on the right hand side of the pic, with your sub title under the ribbon or lace strip, and place your other embellishments to make the lo your own.

Mine will be shown in the CPC February Mid Month newsletter.

Please upload yours into the Gallery , and I will choose one to show here on the blog :)

So, what are you waiting for??? Dont forget to share - I will :)

Thanks for taking my blind challenge

Deb (aka TD)

Friday, 6 February 2009

This week's Scrapbooking Sketch

The very talented Deb has drawn us another sketch!!!!

Would love to see your interpretation of this gorgeous sketch!
This fantastic page was done by Kris, I saw it in the gallery and wanted to share it with you all.
She has used Deb's Sketch and the February Designer Kit...Love it Kris.

Thursday, 5 February 2009

Monday, 2 February 2009

Spied in the Gallery

Whilst scouring through the recently uploaded layouts in the gallery today, I came across this layout...


POISED - created by Bramblebabe....

I love the muted tones, the addition of the driftwood from the beach, all the beads & fibres. The paper rolling technique used is absolutely gorgeous too. What an all-round awesome layout!

Who's going to be our next featured artist? Keep your eye on the blog for the next layout that catches our eye soon!