Sunday, 28 February 2010
Mish's Sketch
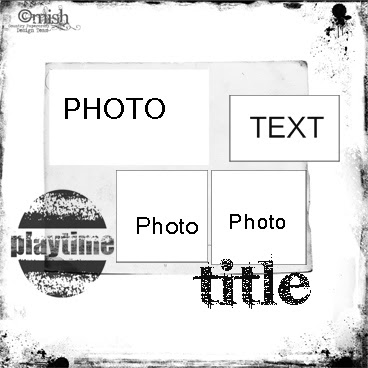
This week it is my turn to post a sketch challenge on the blog...
I would like to see your sketch full of colour and fun! I am hoping that I can create a layout tomorrow - being a public holiday here in WA!
Please feel free to use this sketch, place a link in the comments section to your layout so we can all see...
****Edited to Add****
Well - I scrapped! The first time since December - but as I have used the March Designer Kit I will just show you a couple of snippets of my layout - You will have to wait until the Mid Monthly newsletter to see the reveal
Saturday, 27 February 2010
Friday, 26 February 2010
Thursday, 25 February 2010
Sunday, 21 February 2010
New challenge
Well, it is my turn this week to set the Blog challenge, and I know you are excited about that, lol.
It's a recipe challenge. Please select at least 3 items form the following list and use those items to create your masterpiece.
Please do not forget to show us your creations.
The Ingredients:
1. White background
2. String
3. 2 photos - smaller than 6x4
4. Distressing
5. Stamping
6. White space
As you can see from the example, I have actually used all 6 ingredients to create my layout (although the white background is hard to pick up).
The pp's are Kasier Q3 Shaken Not Stirred collection, and the small black and white alphas are also by Kaiser. Both of these products are available from CPC.
The string I have misted with Black Magic Glimmermist, and although this particular colour is not available at CPC, Marg does have 23 other colours you can chose from :)
I have also used the Black Magic on my stamp for the chippie letters, but applied a bit too much pressure on the 'scr' so they came out inked :(, but he 'eam' are fine.
I have distressed the edges of the pp's with my Heidi Swapp edge distresser whch you can pick up from CPC.
Hope you enjoy my recipe and I look forwatrd to seeing al the fabulous creations
Happy scrappin'
Deb xoxo
Monday, 8 February 2010
A new challenge ...
Your challenge this week ladies is a recipe challenge, you can choose the ingredients and the method and happily create away.
Choose at least 5 [five] of the following ingredients.
Colour combo – aqua/green/white
Paint or Glimmermist
Ink
Clocks
Flowers [at least 6 of them]
Ribbon
Lace
Pearls
Bling
Tags
My example is here ...
Two little girls ... I've used pics of two little girls on their first day of school ... a generation apart ... the photo on the left is my daughter on her first day of school and you guessed, the little girl on the right is me ...
What have I used :
Tim Holtz crackle paint – Broken China – I’ve painted over magic mesh, waited for paint to dry, removed mesh and placed it elsewhere on my layout
Magic mesh
Pinecone ink
Kindyglitz
Beutron buttons – shabby chic
Glimmermist
Carolees Creations – tiny alpha stickers
HS acetate ghost clocks
Prima mini roses
Kaisercraft pearls
MS doily lace edge punch
Adhesives : Express double sided tape and Papercraft mini circles, and glue dots
Don’t forget to check out the CPC shop – you can find all of these scrapping goodies and more.
And ... don’t be shy ... share your creations with us.
You can leave us a link or you might like to join us in the forum and pop your layout in the gallery.
Happy creating.
Signing off
Michelle [aka Mrs Frizz]
Friday, 5 February 2010
Valentine's Day
Hope you have all remembered that Valentine’s Day is coming up ... you know that special day of love ... although to me every day should be a special day of love!
Want to whip up a card that really doesn’t take too long at all ?
Go on, you know you do!
Let me share.
You are going to need the following materials :
2 pieces of cardstock
1 piece of felt
Embroidery thread
Ink
Alphas
Adhesive [double sided tape]
Grab a piece of cardstock to use as your base, I have used pink.
I cut my base cardstock 9” long by 4 ½” deep. Score and fold in half.
Ink around all the edges.
Cut a piece of white cardstock 4” x 4” and ink around the edges ... simple really.
Grab a piece of felt, yep, good old crafting felt comes in handy [check out the huge variety of colours in the shop].
Cut out a heart shape – mine is approximately 3” in size – now you can either do this freehand or do what I did.
I jumped on the computer and opened ‘Word’ – opened my drawing tools and found the heart shape, sized and resized and printed it off on to normal paper, cut it out and then placed it on the back side of the felt, I drew around it and then cut it out. It truly didn't take that long, honest!
Once you have cut out your felt heart, put adhesive on the back of the heart, I used double sided tape and then you stick it down on white cardstock.
Now grab a paper piercer and make holes around the heart into the cardstock and pierce a hole into the felt heart as well, similar distances right around the heart ... make sense ... I’m sure it does.
Needle and thread, in my case, I dug into my sewing box and chose black embroidery thread and then I have stitched all the way around the heart using long stitches backwards and forwards.
Easiest way of doing this is stitching from the back to the front first through the pierced hole into the felt – you can’t always see the hole in the felt if you are stitching through the top to the bottom in the heart ... hope that doesn’t sound too confusing.
Use adhesive [double sided tape] on the back of the white cardstock and adhere to base cardstock, in my case the pink cardstock.
Grab some alphas, put on a greeting or title and voila ... you are done.
Hopefully you have a card that looks something like this.
Now that wasn't too hard ... be honest!
Don't forget to share.
Happy creating.
Signing off
Michelle [aka Mrs Frizz]
Wednesday, 3 February 2010
WELCOME TO THE TEAM
Country Papercraft is very pleased to welcome the two new permanent DESIGN TEAM members.
Welcome to Michelle F (Mrs Frizz) who has been guest designer for the past 3 months. Michelle now joins us full time as a Designer.
We also welcome Lee (LaLaLee) to the team! Lee's funky style of scrapping with add flair and flash to our newsletter features.
Welcome both ladies - we hope you enjoy being part of the team!
FEB DESIGNER KIT ---
This month's Designer kit is all READY SET GO!
Ready to suit all those 1st day of school photos.
*Basic Grey's Paper Ranges:
-Skate Shoppe's KickFlip
-Recess' Arithmetic
*Carolee's Creations Primary Stripes
*Scenic Route's Playing Cards Large Numbers
*Pink Paislee's Reindeer Games Circle Scallop
*Rusty Pickle's Vintage Pencils - strip
*Bazzill Cardstock
-Tokyo
-Typhoon
-Bazzill White
*Basic Grey's School Transfers
*Lil Davis Chipboard Alphabets
Subscribe to:
Posts (Atom)